Add your own domain to your S3 hosted static website

I am a dedicated double certified AWS Engineer with 10 years of experience, deeply immersed in cloud technologies. My expertise lies in a broad array of AWS services, including EC2, ECS, RDS, and CloudFormation. I am adept at safeguarding cloud environments, facilitating migrations to Docker and ECS, and improving CI/CD workflows with Git and Bitbucket.
While my primary focus is on AWS and cloud system administration, I also have a history in software engineering, particularly in Javascript-based (Node.js, React) and SQL.
In my free time I like to employ no-code/low code tools to create AI driven automations on my self hosted home lab.
In one of the previous articles we've created an S3 static website. It was using the CloudFront generated URI, which isn't particularly professional 🙂
In this guide we'll connect it to our own domain.
Services we use
Route53 for DNS management
AWS Certificate Manager for SSL certificates
CloudFront
This guide assumes you have DNS management in AWS. I'll lightly mention the other 2 options we might have if you don't want that within AWS.
Step by step
This guide assumes you went through with the steps of creating an S3 static website, and therefore will build on that architecture.
In a nutshell these are the steps we'll take:
create a hosted zone under subdomain (optional)
create 4 NS records in Cloudflare for aws.krisfeher.com (optional)
edit CloudFront to add Alternate Domain Name
request a certificate in N.Virginia (all CloudFront certificates requires a cert in this region)
add the DNS validation check entry to Route53
Select the now existing cert in ACM
Wait for deploy
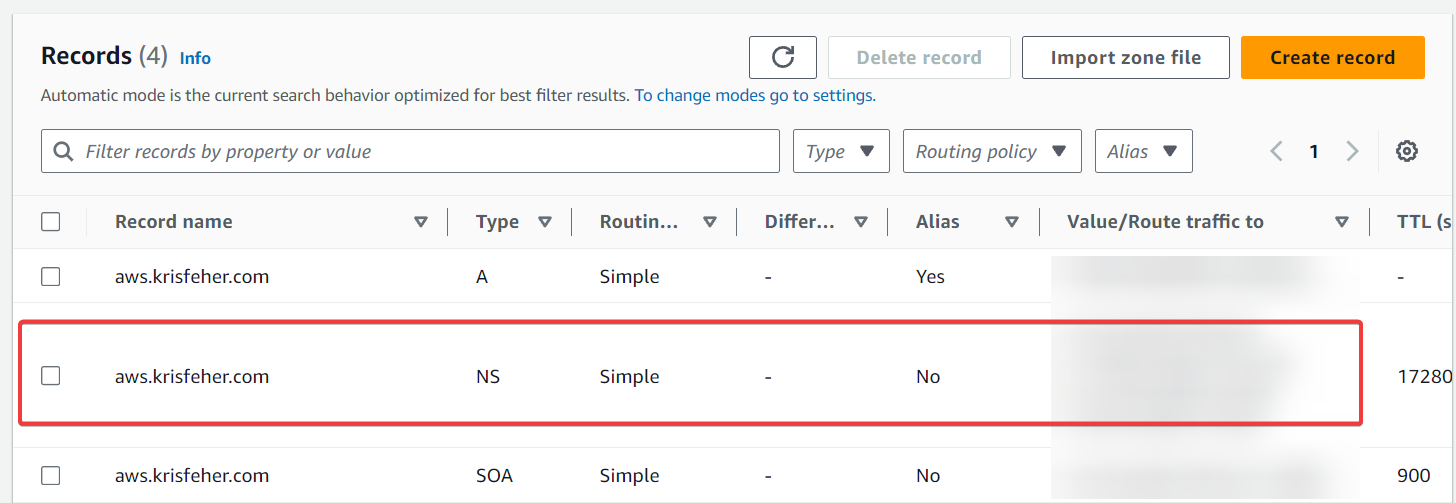
Create alias record in Route53 to direct to the CloudFront distribution
Create a hosted zone
As mentioned, this step is optional, you may already have one and in that case just skip this step.
Go to Route 53 => Hosted zones => Create hosted zone
Add the domain you want to control and make it public.
Direct NS queries from your provider to AWS
You may be in the same shoes as me, and have your DNS managed in CloudFlare (or elsewhere). If that's not the case, you can safely ignore this step as well.
Otherwise, you can create an NS record for a subdomain within Cloudflare and direct it to AWS's name servers:
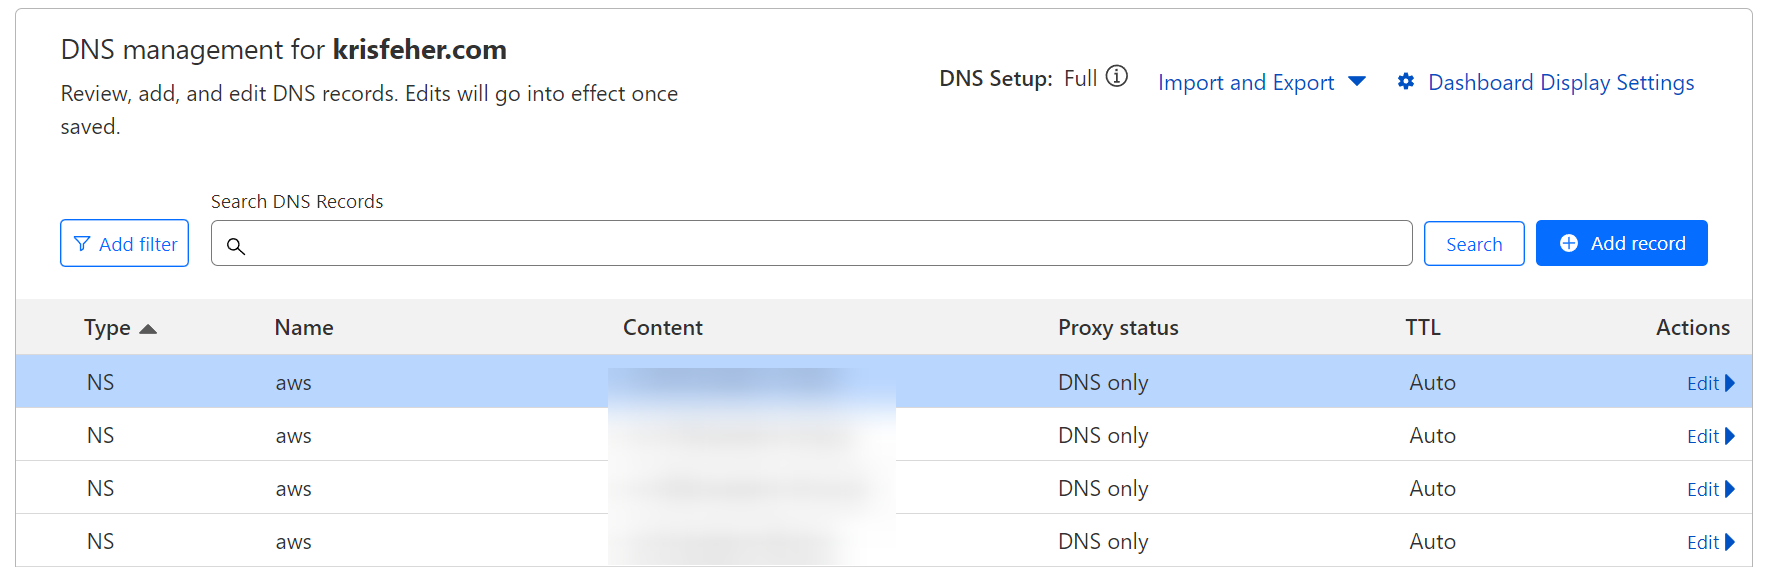
You can of course just redirect the entire root domain if you want to handle it all in AWS.
You can find out your NS name servers in Route53 once you created a public Hosted Zone for your domain/subdomain:
The advantages of this approach is that SSL termination will be handled entirely in AWS, and this setup is very simple.
(alternatively) If you want to avoid a Hosted Zone in AWS, you'd need to set up SSL ideally in both Cloudflare (or wherever you manage your DNS), and AWS.
It's because you want to make sure SSL is enabled from your browser to => CloudFlare and from CloudFlare to => AWS.
This process is a little more complicated and the SSL setup entirely depends on your provider.
Add custom domain to CloudFront
Go to CloudFront => Distributions => EXXXXXXXXT => Edit settings
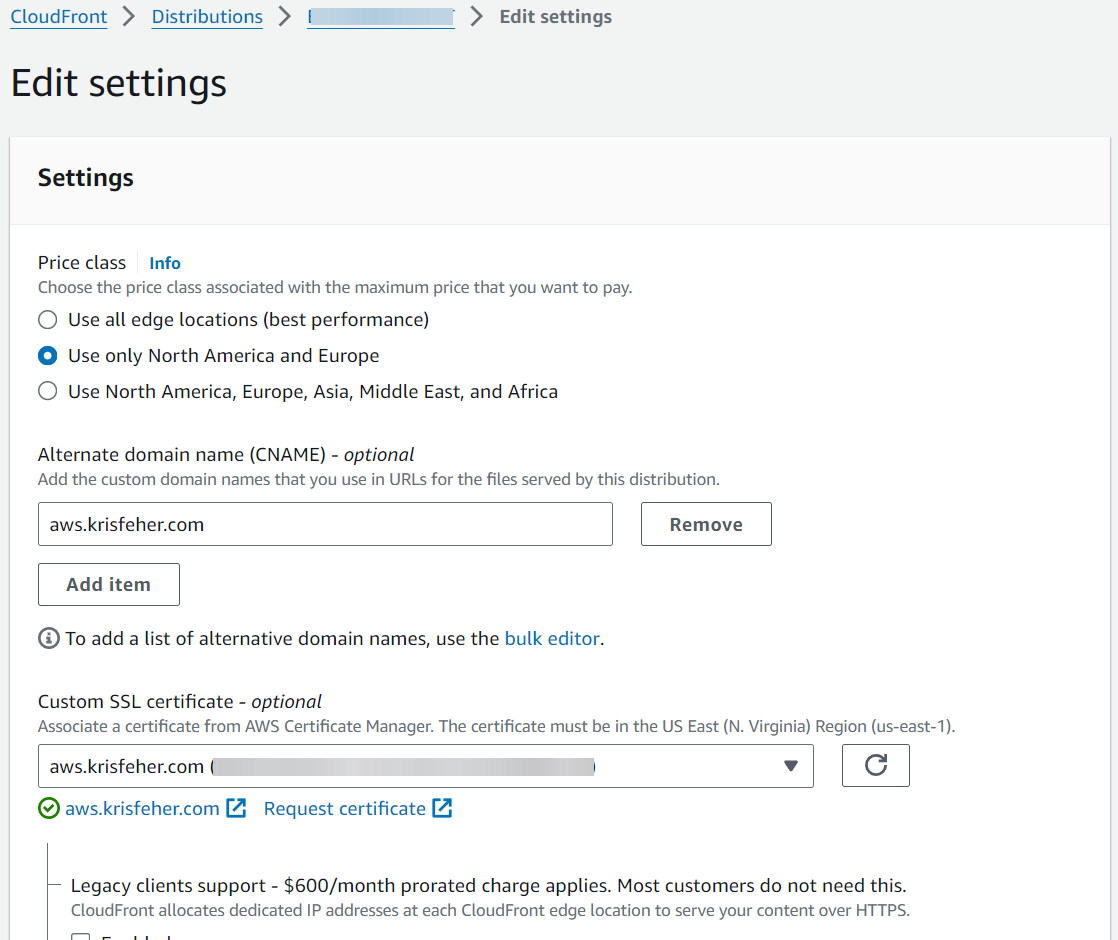
Here you can add your Alternate Domain name.
Then select the SSL certificate which will prompt you to create a new one.
Request a new CloudFront SSL certificate
The previous step should take you to N. Virginia region's create certificate console.
If it hasn't, the you can navigate to:
AWS Certificate Manager => Certificates => Request certificate
Request a public certificate there, and add your fully qualified domain name or a wildcard if you want to have the certificate cover your entire domain.
Add the DNS validation check entry to Route53
This is required if you selected DNS validation.
AWS will generate a CNAME name and a CNAME value on the certificate you need to add to Route53, which looks like this:

You can add these manually to wherever you control DNS (either to Route53 or to Cloudflare/etc.)
For convenience AWS added a "Create records in Route53" button on top which just does this for you.
Continue in Cloudfront to add the certificate
Once you did the above step, wait a couple of minutes until your SSL certificate is validated. You can see a "Success" message on the certificate instead of "Pending..."
If that's done, refresh the certificate list on Cloudfront and select the newly created cert.
Click "save chances" on the bottom of the page and wait until the distribution re-deploys (took me about 5 minutes).
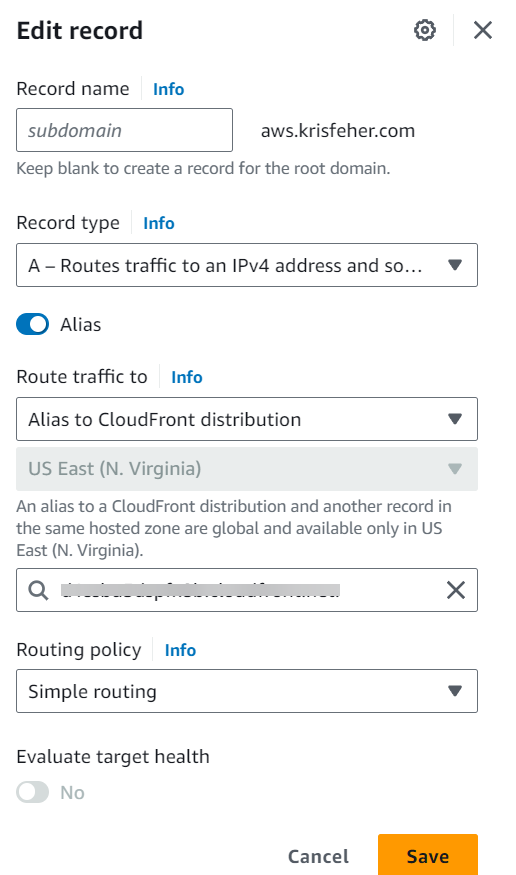
Create an alias in Route53
The last step is to direct calls to aws.krisfeher.com to the CloudFront distribution
Create a new A record in Route53 and tick the "alias", then select CloudFront and your distribution name.
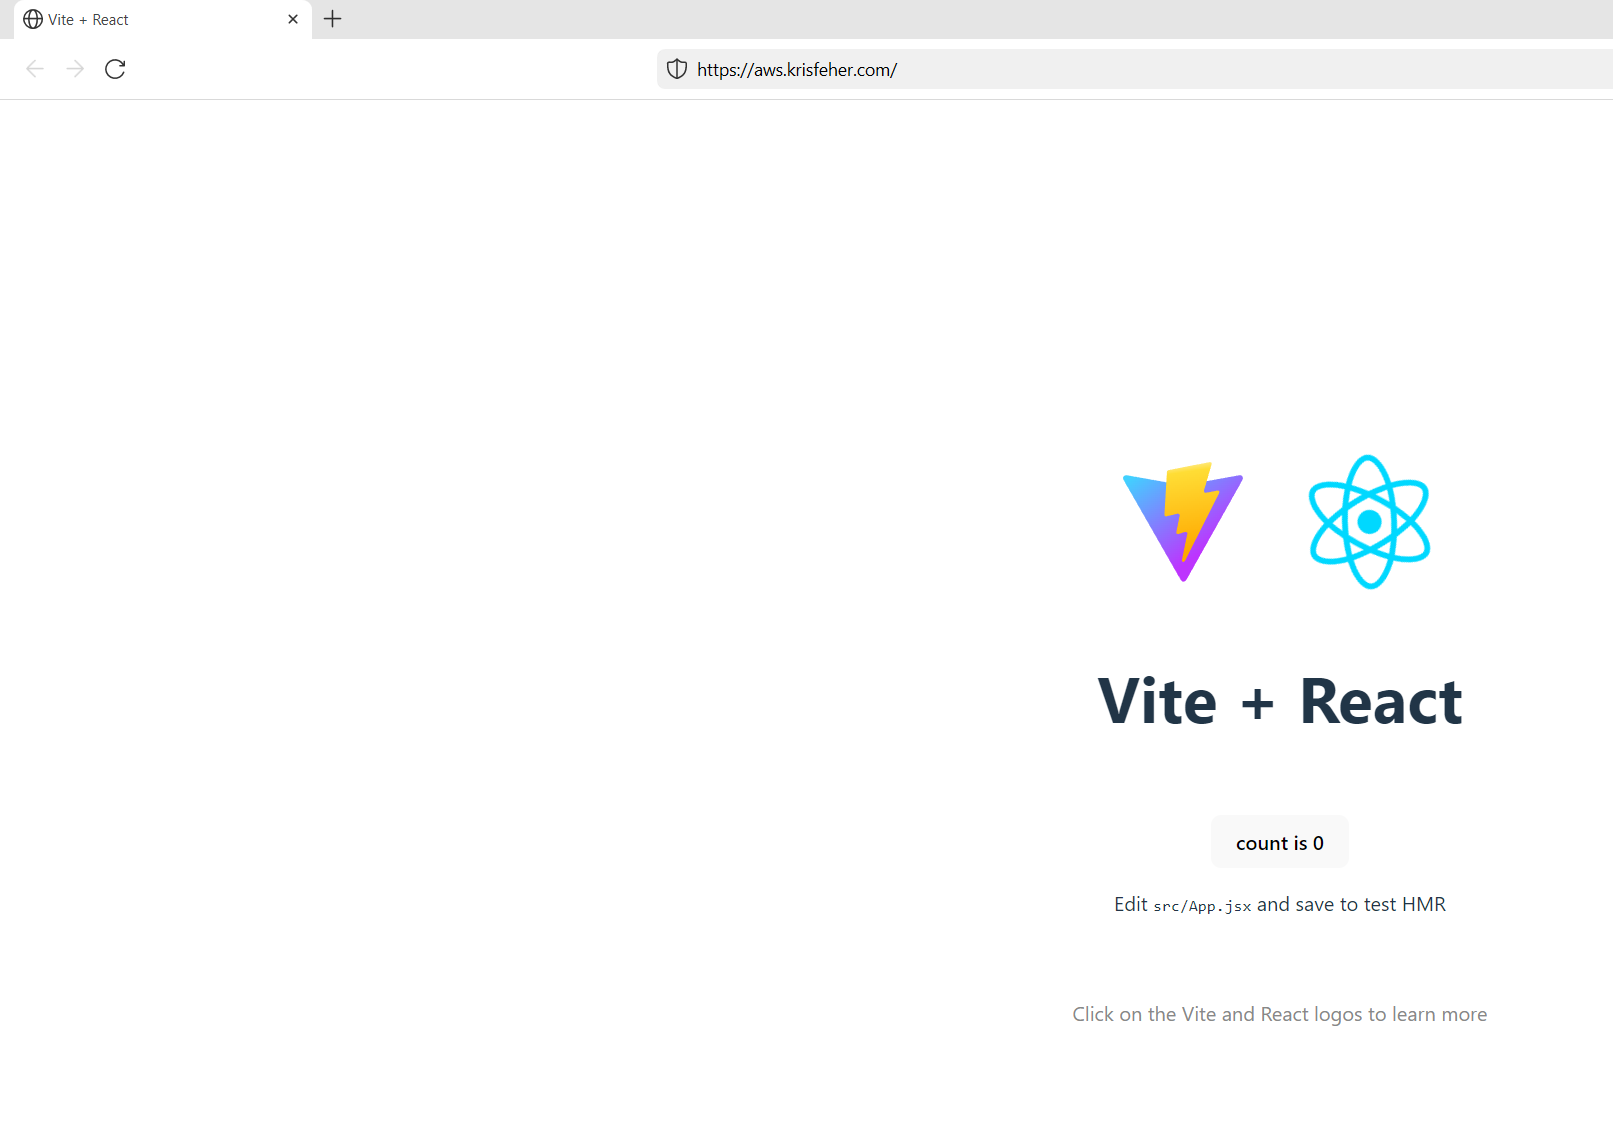
Done!
Once this is completed, you can access your static site from the new domain name. In my case, the example Vite project: