How to access S3 like it's your local files

I am a dedicated double certified AWS Engineer with 10 years of experience, deeply immersed in cloud technologies. My expertise lies in a broad array of AWS services, including EC2, ECS, RDS, and CloudFormation. I am adept at safeguarding cloud environments, facilitating migrations to Docker and ECS, and improving CI/CD workflows with Git and Bitbucket.
While my primary focus is on AWS and cloud system administration, I also have a history in software engineering, particularly in Javascript-based (Node.js, React) and SQL.
In my free time I like to employ no-code/low code tools to create AI driven automations on my self hosted home lab.
At the end of this quick guide you'll be able to access S3's unlimited storage locally form your PC.
After setting this up once, you don't need to even open a browser!
1. The tools
We'll use the following tools:
S3
IAM for permissions
Cyberduck (or any other file explorer client with S3 support)
That's all!
2. S3 setup
Go to S3 here, and create a bucket Amazon S3 => Buckets => Create bucket
Give it a name, and leave everything else default (for now).
3. IAM setup
As Cyberduck (and many 3rd party tools) only accepts access key and secret key, we'd need to generate one with appropriate permissions.
If you're doing this as an admin, you don't want to have all permissions associated with your account provided to Cyberduck.
In security, it's called Principle of least privilege, which is:
... a security concept that ensures users or entities only have access to the necessary data, resources, and applications for completing a task, and no more.
Let's create a new user for this purpose at IAM => Users => Create user . Give it a name.
Then create a new policy at IAM => Policies => Create policy
And add a JSON for the policy with your own bucket name:
{
    "Version": "2012-10-17",
    "Statement": [
        {
            "Effect": "Allow",
            "Action": [
                "s3:ListBucket"
            ],
            "Resource": "arn:aws:s3:::cyberduck-bucket"
        },
        {
            "Effect": "Allow",
            "Action": [
                "s3:GetObject",
                "s3:PutObject",
                "s3:DeleteObject",
                "s3:AbortMultipartUpload",
                "s3:ListMultipartUploadParts",
                "s3:InitiateMultipartUpload",
                "s3:UploadPart",
                "s3:CompleteMultipartUpload"
            ],
            "Resource": "arn:aws:s3:::cyberduck-bucket/*"
        }
    ]
}
Save this policy under a name, then go back to your user and attach the policy to it.
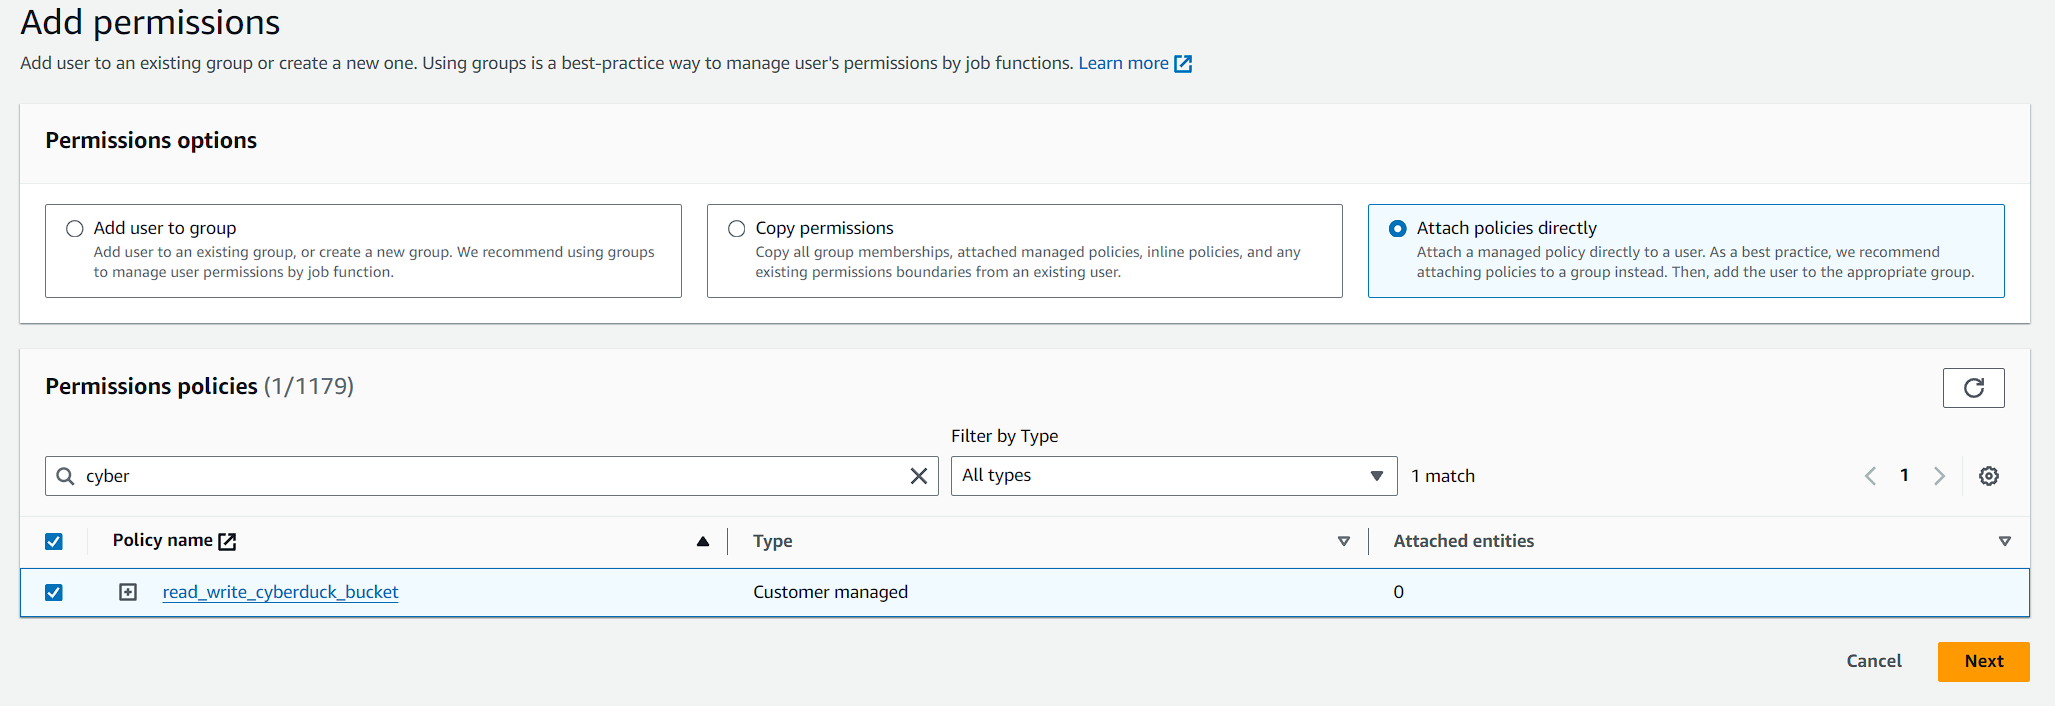
Once done, create an access key for the user IAM Users => cyberduck-user => Create access key
Once you generated one, you can go to the next section and enter it in Cyberduck.
4. File explorer
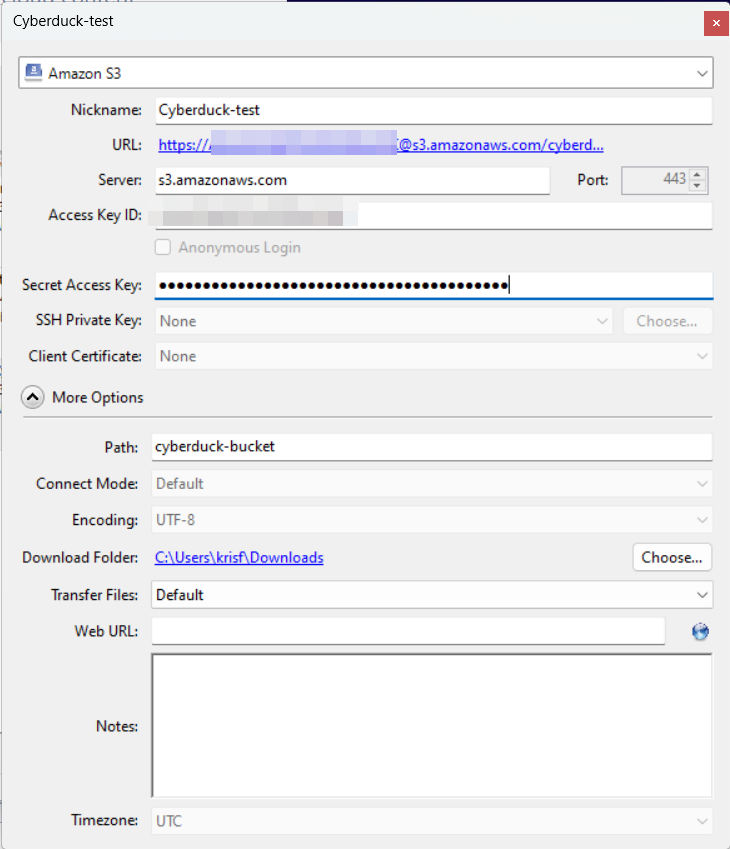
Download Cyberduck (or your tool of choice) and install it.
Create a new "bookmark" and fill in these details.
Add the Access Key ID of the user we created in the previous section.
Make sure you add the bucket name to the "path" variable. As you see this is also appended to the URL above. If you're using a different client, it may ask for the full URL instead.
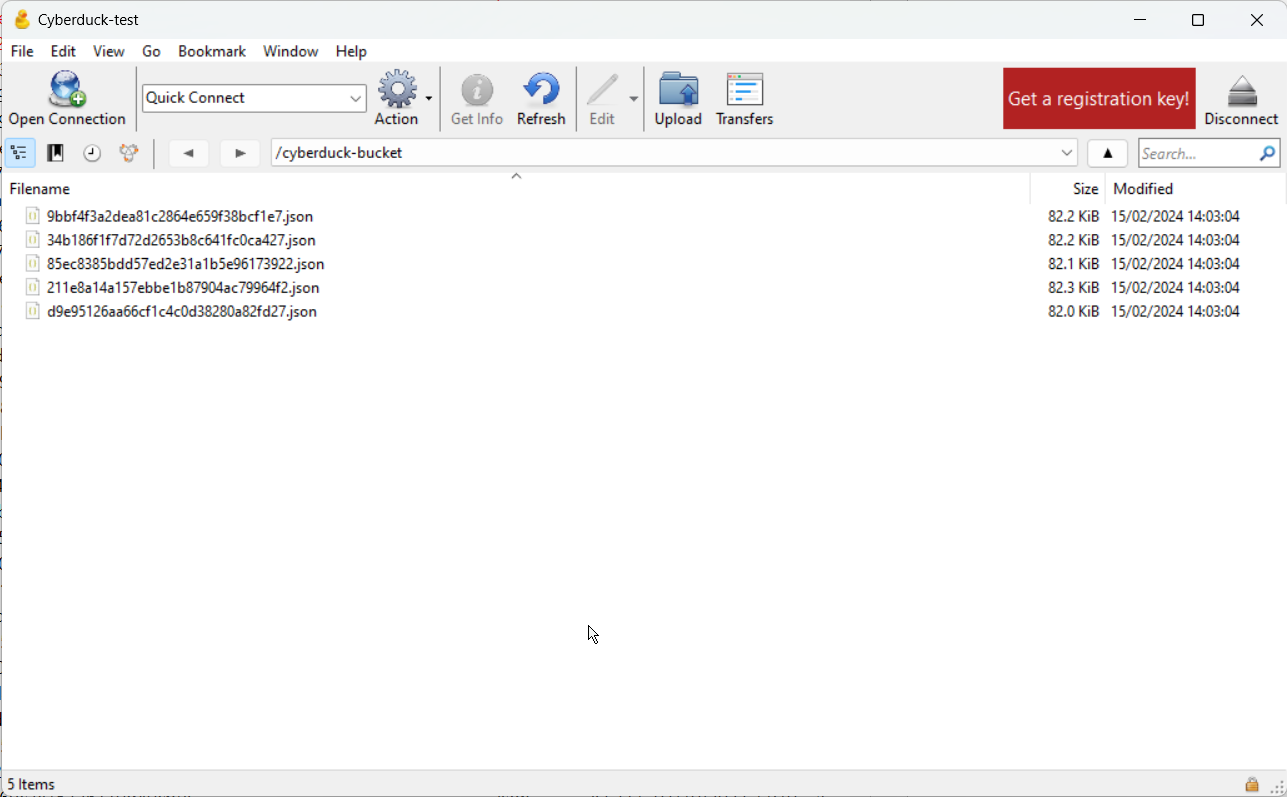
Once done, you can drag and drop files across S3 without resorting to S3's own console or using the terminal.
That's it!
Hope this quick tutorial helped you being more comfortable using S3.